Showing posts with label Open Source Software. Show all posts

Monday, December 7, 2015

Better Noise Reduction with Darktable

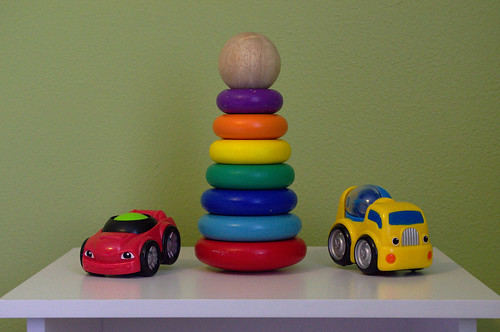
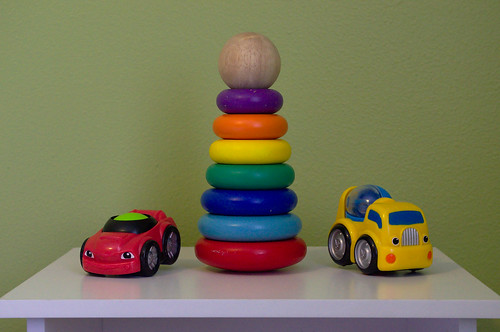
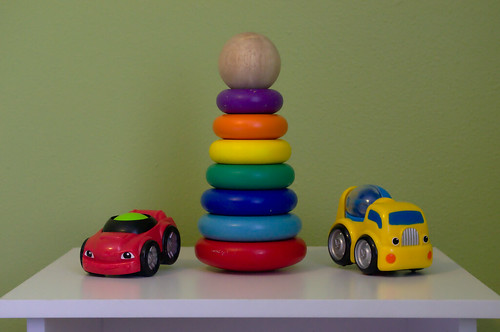
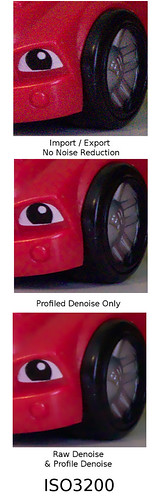
In a previous post, I wrote about Darktable's profiled noise reduction with a set of sample images to compare the results. And while the basic profiled denoise algorithm still gets great results in Darktable, I have found another method that yields even better results (that incidentally, still utilizes the profiled denoise, but to a lesser extent). It may not show as much as I had hoped in the images below, but I have found this method especially attractive when dealing with photos of people. Steps and samples below:

First step is of course to import your images to Darktable. Next, we will run the Raw Denoise module. In most instances (especially with people) I have found .003 to be a good starting point. Typically the default .010 threshold can make images too soft. For the compared images of the kiddo toys, I used .014 for this setting.

Next step is to apply the profiled denoise option. The default strength of 1.000 is typically overkill after applying the raw denoise first. For my images I have found a value of less than .300 is a good balance to retain detail, typically I use .289. For the sample image, the value used was about .400.

3200DTComp
Composition for Comparision
 
No Noise Reduction
No noise Reduction (Imported and then Exported in Darktable)

Profiled Denoise Only
Profile Denoise Only

Raw Denoise & Profiled Denoise
Raw denoise & Profiled denoise used together

For additional comparison I have added a new image to the original Flickr set that shows the processing done with my refined noise reduction routine.

Blessings,

Jesse

Monday, April 21, 2014

Converting an Image to Black and White with Darktable

When converting an image to black and white, there are different ways to go about it with different programs. From a basic desaturate command to a more involved process where you are manipulating multiple channels to adjust the final look. In this post we will be exploring two different ways to convert an image to black and white with Darktable.

First step after importing our image into Darktable is to make our adjustments as if we were developing the image in color (noise reduction, white balance etc...) Below is a screen shot of my initial development and and the adjustments used (sharpen and base curve are automatically applied upon import).

Imported and Developed as if for a color image final

Next, we will use the monochrome module in Darktable to do our first conversion. For this module, simply drag the circle around the color pallet until you have the desired look. You can also make the target circle smaller or larger (using the mouse wheel or two finger scrolling on a laptop track pad) which will change the final look of the image. Below is my screen shot of my monochrome conversion with this module (I had shrunk the circle slightly and moved it away from center).

Monochrome module settings

Now for the channel mixer module, which is my preference and that in my opinion,  is the option with the best results.  With the channel mixer selected, we will choose gray as the destination and then simply adjust the three (red, green & blue) channels till we have our desired results. In the screen shot below, you can see the values for my adjustments.

Channel Mixer module settings
Now that we have gone through the steps taken, below I have the resulting images for viewing and comparison. First the photo converted using the monochrome module followed by the channel mixer module.

Monocrome Conversion #1 with Darktable
Monochrome Module conversion

Monocrome Conversion #2 with Darktable
Channel Mixer Conversion

Your thoughts? Do you have a favorite way to convert to black and white or other methods that have great results not discussed here?


Blessings,

Jesse

Tuesday, January 14, 2014

Developed RAW vs Developed JPG

When it comes to the RAW vs JPG debate, You don't have to look very hard on-line to find ample amounts of writing espousing the benefits of one format or the other and why you should or shouldn't shoot exclusively with either one. And despite what the title of this post may imply, I will not be debating the merits of either format but rather providing a visual example of one image edited with both formats as a starting point. Both the RAW and JPG file formats have their inherent advantages and disadvantages, but that's another post.

The photo below of a Giant Pacific Octopus was taken on a recent trip to the Seattle Aquarium. The photo was taken on RAW+JPG @ ISO 3200, with the RAW file then developed in Darktable and the JPG file in the GIMP.


Camera JPG


Darktable Edit


Gimp Edit

Of the two developed files, I think the Darktable version is closer to what the scene looked like. But then again, I don't recall exactly as I spent about as much time watching the Octopus as it took to take that photo. Chasing my highly active and very excited 16 month old son left little time to focus on taking anything more than the passing snapshot. On the other hand, in this case I like how the GIMP edited photo turned out a little better, the slight color differences change the mood and feel of the photo. I also could have explored more of the editing options in Darktable to get a similar look, but this was a fairly straight forward, minimally adjusted image for this comparison.

Blessings,

Jesse

Tuesday, January 7, 2014

Darktable's Profiled Noise Reduction

If you are working with JPG files from your camera, you will not need to be too concerned about noise reduction unless you are shooting at a high ISO as the JPG compression algorithm of your camera will apply some form of noise reduction, even if set to off.

RAW files on the other hand will naturally not have any in-camera noise reduction applied and it will be up to you to determine if and how much will be applied during post production. You will likely be able to notice noise even at and ISO as low as 200 when viewing your RAW files at 100%. If not removed, that noise will be present in the exported JPG as well.

When working with Darktable, there has been a profiled noise reduction option since version 1.2. As the name implies, the Profiled Denoise option is based on unique camera model/ISO combinations to optimize the noise reduction while retaining image quality. From working with my RAW files I have found this to be a fantastic option that works very well and it is usually the first edit I apply to any of my images.

For comparison, here is a series of 100% crops taken at ISO 200, 800, 1600, 3200 & 6400 with the Darktable edited photo on top, and the straight off the camera photos on the bottom. The color difference is simply the difference between the standard setting on my Nikon D5100 and the RAW image after Darktable applies it's built in base curve. The Profiled Denoise was set to the default value on all images except for the ISO6400 shot, which was changed to patch size 3, strength 3.


For reference and more in depth comparision, you can see all the full resolution shots at this Flickr Set.

I have found working at ISO400 gives me a good balance between low initial noise, quicker shutter speeds and very little detail loss from the denoise algorithm. Below is a good example of a developed photo taken at ISO 400: My Father-in-law's 1964 Impala SS.


Blessings,

Jesse

Thursday, October 10, 2013

Converting an Image to Black and White with the GIMP

Some photos may not come out the way we anticipated, the weather may not cooperate when you are traveling or have the time to take photographs which could end up leaving a final image that is simply missing something. Or perhaps the scene just doesn't seem as interesting upon final review as it may have seemed when framing the photo in the viewfinder or LCD screen. And sometimes, a scene just lends itself to be more appealing as a monochrome image.

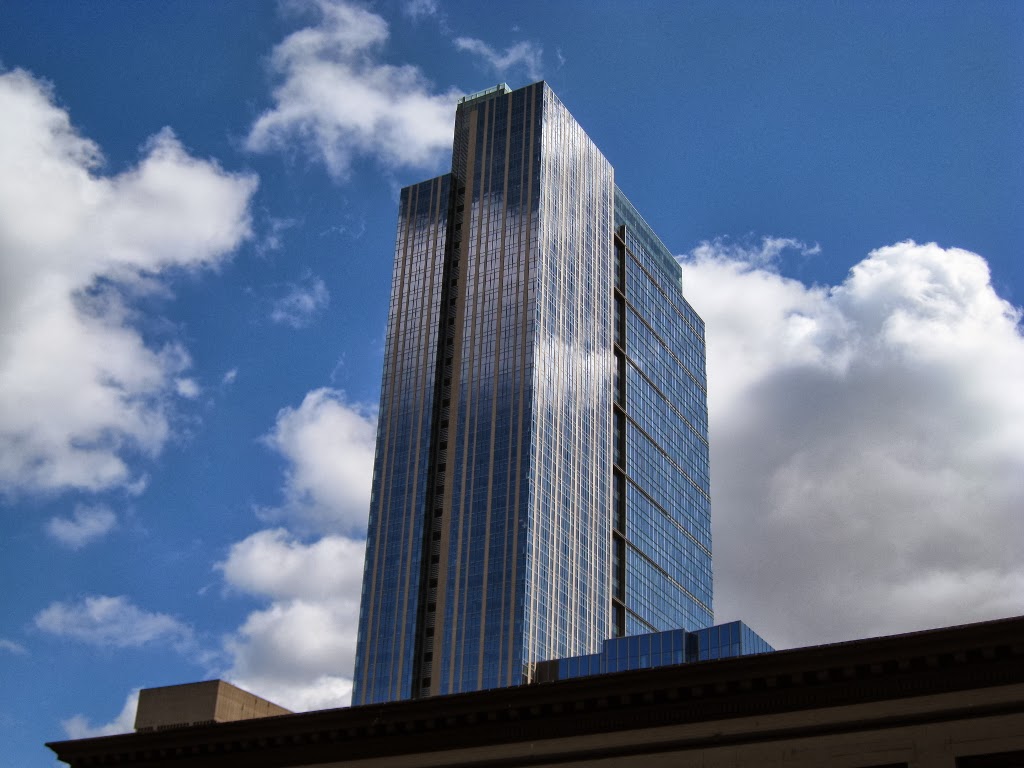
The image below is one from my collection that wasn't anything very eye catching as a color photo, but after a black and white conversion is vastly improved. This photo was taken in Seattle several years back on a trip meeting up with my brother.  A simple tutorial on using The GIMP program to convert photos to black and white follows the images.

Original Color Image

Seattle Skyscraper in Black and White
Black and White Version

Converting a photo to black and white with the GIMP program is a simple task that takes a little bit of experimenting with for the best results. The following is a simple path to follow to convert your images.

Step 1: Open the channel mixer, located under the color menu - components - channel mixer.

Step 2: Check the preview and monochrome check boxes. You can also resize the channel mixer window to get a larger sized preview image.

Step 3: Adjust the sliders (red will be defaulted to 100) to get your base settings close to optimal, we will add an extra adjustment after the channel mixer step to fine tune the look. I have found that on many images having the blue channel fairly close to the inverse of the green channel (say, 40 green -50 blue and/or similar combinations) yields pleasing results. When you are happy with the preview box, click OK. You can even save the slider settings for later use with the save option/button. Being able to save the black and white settings is a useful tool. To make things quicker I will typically size the image down before starting, get my channel mixer settings the way I want and then save them so I can apply them to the full sized image - this is a handy trick to boost performance if you find the channel mixer slower to respond.

Step 4:  To fine tune our conversion after editing with the channel mixer we are going to duplicate the background layer and change the mode to multiply (to darken the image slightly) and lower the opacity so that we are just darkening the image slightly. You could of course, leave the opacity at 100% if the extra darkness works for the image. If you need to lighten the image slightly we can change the mode to screen and drop the opacity as needed.

Step 5:  Export your image to JPG (or preferred format) for printing or web use and you are done. When doing edits like this I like to save a copy of the image in the native GIMP format (.xcf) so I have a working copy with all my extra layers if I need to revisit or tweak the image at a later time.

The black and white skyscraper image I have printed and hanging up in my office, this is so far my favorite black and white image I have made.

Blessings,

Jesse

Wednesday, May 22, 2013

Removing The Sunny Day Haze


Nothing like a bright sunny day to get you outside, especially come spring time when the daylight hours begin to last longer and the cold chill of winter starts its slow retreat to make way for the long awaited summer warmth.

While a nice break from winter weather, the bright sun poses some definite challenges for photography, with one being the bright hazy and washed out look that ends up in many photos. This can be be fixed with some digital development if the image isn't too washed out. I have had some good luck fixing the haze with The GIMP program and below have the general outline of my steps, though with this particular demo image my results weren't worth much as it was quite hazy.

First here is the original photo, nothing spectacular - just a view from a local observatory that came out hazy and washed out looking:

Original Photo

For images that have some unwanted haze, but aren't too far glazed over below are my steps I typically use in The GIMP program that I have had some luck using to eliminate much of the haze and improve the photo:

Optionally, warm the color tones up slightly (as I mentioned in a previous post)

Step 1: Adjust brightness (down 10-30 points or so) and contrast (up 5-10 points or what looks appropriate)

Step 2: Adjust levels down to .95 - .85 from the 1.0 default middle option (again, this varies with the photo and level of haze)

Step 3: Adjust curves in a manner similar to the below screen shot, pulling the lower left curve down slightly and the upper right up slightly - adjusting as needed for the particular image.


Working with a RAW image is where we can really get some great results on images that may appear to be throw aways. Some we will be able to get great shots from and some may only be turned from a discard into merely a decent image.

Using Darktable, follow the below steps as a template to bring out the potential in your hazy sunny day images:

1: Exposure adjustment - boost the black slider slightly (toward the right) and leave the exposure adjustment alone.

2: Local Contrast - boost contrast and detail slightly (to the right)

3: Levels - Adjust the middle bar slightly to the right.

Three quick steps and below is the final result:

 Darktable Adjusted Final

The more I work with Darktable to develop RAW images, the more I see the advantages to the RAW format. The results are often much better, even if the only adjustments are the base curve and sharpening the program applies upon import and the extra development time is very minimal.

Anyway, there you have it: a good starting point to help bring out some pop to an image otherwise destined for the discard pile. Happy developing!


Blessings,

Jesse

Saturday, May 4, 2013

A Quick Adjustment To Improve Your Digital Photos

From my experience, digital cameras are notorious for rendering photos with color temperatures on the colder side - especially if you use auto white balance. This isn't to say that every photo you take with a digital camera will look like it was taken in the coldest winter in the arctic circle, but the image may not look as inviting as it did when taken when a steely gray/blue cast permeates the scene.

This can be addressed with a quick and simple color balance adjustment to warm up the color tones. Using The GIMP program (free, open source and available cross-platform) simply go to the colors menu and then choose color balance. You will be greeted with which ranges to adjust and three adjustment sliders: Cyan/Red, Magenta/Green and Yellow/Blue.

For most images you don't need to do much, a simple +5 on the Cyan/Red scale and a -5 on the Yellow/Blue scale done with the Midtones option selected is just enough to do the trick.


For illustrative purposes I have an old photo taken of my old cat with my first decent digital camera, a Minolta Dimage S304. The first image is the untouched photo from the camera, followed by one done on Midtones only with a +10, 0, -10 on the scales and the last one with a +5, 0, -5 adjustment done all all three range adjustments.

Original


+10, 0, -10 - Midtones Only


+5, 0, -5 Shadows, Midtones and Highlights

As you can see, it doesn't take much to positively change the final image. And if you are new to digital development, this is a great place to start that will improve many photos all the while not being difficult.

Blessings,

Jesse

Wednesday, April 10, 2013

In Camera High ISO Noise Reduction Comparison

With modern camera's more is always better, or rather more is almost always the trend when it comes to specifications. ISO ratings are no exception, as new cameras push the available ISO settings higher and higher with each new model. The higher ISO options help with low light but come with a big downfall in the form of higher concentrations of noise present in the resulting photos. To help offset this, many cameras offer a High ISO Noise Reduction option, and photography development software also offers noise reduction modules . The downside to noise reduction can be a loss of image quality as the algorithms tend to soften the image in the process.

For an experiment I set my Nikon D5100 to ISO 6400, placed it on a tripod and took four successive photos. The first with High ISO Noise Reduction set too off, the next set to low, then medium and finally high. Below are crops of the resulting images for comparison to see how the various levels of noise reduction look in a final image. I also used Darktable to run noise reduction and some slight sharpening on the image with noise reduction set to off for some additional comparison (this image is labeled ISO 6400 DT).


Quality wise, I think the low and medium strike a good balance. My approach so far has been to leave my camera on low reduction, and then use Darktable to do some additional noise reduction and/or sharpening when needed. I have been very happy with the results from this setup when I have needed it.

How about you? Do you find a particular noise reduction setting gives better results balancing quality and noise reduction than others?

Blessings,

Jesse

Monday, March 25, 2013

Digital Photography on Linux

In any industry the advent (and improvement) of technology will lead to the inevitable changing of the guard from the way it started to the new technology way.  The industry of photography is no different, having started with film and now nearly fully transitioned to digital (at least in the consumer space). With this transition to digital has come a huge boost in popularity and accessibility as very high quality equipment is available at reasonable costs. The digital transition also eliminates the ongoing costs of purchasing and developing film while at the same time making it easier to capture great photos. Granted, you will still need to pay for prints of digital photos and factor in a memory card (or cards) purchase, but these have a minimal cost comparatively - especially after amortizing the number of photos you get on one memory card.

With film there was the dark room, and in the early days of digital photography Adobe's Photoshop was king and Corel's Paint Shop Pro tried to compete in the photo editing/developing software arena. Paint Shop Pro would eventually fade away, and while it is true the program has not been scrapped and is still available (in updated versions no less), you hear very little of it in the photography industry and the program fetches a price more on par with Photoshop Elements. With Photoshop well established as an industry leader in the commercial photo editing software, Adobe again led the way and started a new type of photo editing program with their release of  Lightroom. At a much lower price point (though still not cheap) Lightroom was designed specifically for photography and is essentially a digital darkroom.

With this boom in popularity and accessibility for digital photography - coupled with the high end commercially available development software, where does that leave a Linux enthusiast? Are we stuck using proprietary operating systems to run expensive software or stuck running non native commercial software with Wine technology? A number of years ago the answer would probably be yes and go back a few more years and running a Linux based operating system for a home computer would be an even less favorable proposition for many. As it is now, desktop Linux has come a long way and offers a very usable system with many excellent tools to offer photography enthusiasts - all at no cost to the end user (save for the cost of a CD, DVD or USB drive that is used for installation).

With that preface, now lets look at some native Linux software for digital photography. I realize there are likely programs I may have not covered here, but what I have outlined below is a good start and these programs are fairly well known and I have some familiarity with them as well.

In the tradition of the jack of all trades imaging program that comes with nearly endless options useful for digital photo development we will be looking at Pinta and The GIMP. Pinta is a more basic editor and is not as feature rich as The GIMP program and is probably more suited for less advanced users and/or users with more basic photography needs. That is not to say it doesn't have potential or that it is not worth a look. On top of the basic sizing, cropping and rotating you will find options to adjust curves, levels, hue/saturation as well as brightness & contrast. There are also some preset options for sepia tone and black and white conversion. Though, being a more basic editor these are click and go with no adjustments and user control available.

The GIMP on the other hand is very feature rich and an open source project that I feel has tremendous potential - this on top of already being a robust and capable program. The development has been painfully slow in the past, and a user interface design that was cumbersome are realities that have likely been a deterrent for some users. The 2.8 release addressed the UI issue and included many other core updates to the program, and now I feel the potential is really starting to be fulfilled. A couple options that have been missing are also in the works: High bit depth editing is already in the development branch and is scheduled to show up in the stable 2.10 release, while script recording and playback is on the horizon sometime after version 3.0. On top of all the basic options you would find in Pinta, The GIMP offers a plethora of color adjustment options, a channel mixer (great for black and white conversion), a decent list of filters as well as options to extend functionality with plug-ins for a start. While The GIMP is available cross-platform (and I have used it on Windows and OSX), the program runs best under a Linux system from my experience.

Linux doesn't lack a good digital dark room photo program either. First released in 2009, DarkTable is a complete digital dark room style photo editor - currently on version 1.1.4. You will find all the usual suspects when looking over the available functions: Everything from color adjustments, exposure, sharpening, white balance, curves, tethering and RAW support - really to many options to list out individually. Another options is RawTherapee. I have not used RawTherapee, but it appears to have a feature set that would be expected from a modern Dark Room style application.

For photo organization my favorite is Shotwell, which is also the default photo management program in the Ubuntu distribution (which I use). Shotwell organizes photos in events based on dates (from EXIF data), which can be renamed and photos/videos can be moved between event albums. You can also view photos by individual tags if you have tagged images. Shotwell also has support for viewing RAW photos, some basic image adjustments, red-eye removal and the ability to upload to Flickr and Picasa as well as other publishing targets. I have my program set to monitor a pictures folder and Shotwell will automatically import new photos when the program is loaded. DigiKam is also very popular (mainly among KDE based distributions) and has a very dedicated fan base. DigiKam includes many editing and enhancing options as well as a panorama stitching feature. A third option is F-Spot - again, an option I don't have any real experience with to comment on.

For creating panoramic photos, you cannot go wrong with Hugin. A specialized program designed specifically for stitching panoramic shots, Hugin also supports creation of HDR photographs.

The last piece of software to mention in this article is OpenShot. While OpenShot is a non-linear video editor, I am mentioning it here as a tool for creating slide-show videos from your photographs. Of course as a video editor it can do much more, but that is one photography related use as that is our subject. There is also Kdenlive if you are looking for a second option.

So there you have it, a quick run down on some of the software available on Linux based systems for the digital photographer. Is Linux worth a look for a photo enthusiast? My answer would be absolutely. And for those interested, I have created a customized version of the Ubuntu Linux distribution with some of the photography related software detailed above installed by default. The operating system can even be run from a DVD for a trial run with no hard drive changes. My custom version can be download from Sourceforge here.

Blessings,

Jesse
Monday, June 4, 2012

Resynthesizer samples from GIMP 2.8

As I mentioned in my last post, I had some working samples of the resynthesizer plugin available for the GIMP. The photo was taken in Ocean Shores and should make for a good example of the types of photos that work best to use the resynthesizer plugin to remove specific elements from an image.

First up is the unaltered photo, complete with old copyright text leftover from my full on standalone site days.


Next we have four separate elements cloned out using the resynthesizer plugin: the car, kite, gull and copyright text. The text and kite were simple removals by selecting them with the rectangle select tool and running the plugin. When it comes to the car and gull, each were masked out prior to running the resynthesizer. With my experiments to date, I have found that between 25 and 75 seems to be the magic radius range that produces the best results.


And for fun, since this photo in either form does not comply with some basic composition guidelines, I created a second image with the gull moved.


Hope you have enjoyed seeing what can be accomplished with a little work using open source software.

Blessings,

Jesse

Saturday, June 2, 2012

Photoshop's Content Aware & Gimp's Resynthesizer Plugin

I still remember when Adobe's Photoshop CS5 was introduced with the then new Content Aware Fill feature and how incredible the new technology looked. Each demo video quickly and seamlessly removed "unwanted" items from a photo effortlessly - a true wow moment for sure. This feature has also previously existed in the form of the resynthesizer plugin for the GIMP image editor prior to the release of Adobe's Photoshop CS5.

Within the last couple of months I have had a chance to play with both, thanks to Adobe opening up Photoshop CS6 to a public beta. Keep in mind that while the demo video's for this technology make it look borderline unbelievable, it does have limits to what it can accomplish - as I found out during my testing of both the Adobe product and the open source version.

Now, lets look at my case study and do some comparing. Picture the following scenario: A student club photo with several rows of students lined up in front of a stage curtain. One of these students did not belong to the club and the question was posed if he could be removed from said photograph. Thankfully for this test, the offending student was at the end of one of the rows and I thought it just might be possible with the resynthesizer plugin for the GIMP (my work copy of CS3 lacks the content aware technology). So, with the resynthesizer plug-in setup on my machine (then with GIMP 2.6) I set out and masked out the photo bomber (as one student dubbed those sneaking into photos they do not belong in) and ran the resynthesizer. After some tweaking, the photo bomber was removed, though not a perfectly seamless removal as we saw in Adobe demo videos. When viewed at full size, you can definitey tell something was done to the photo, though this was less evident on a copy printed on a laser printer.

This scenario did not play out as well using Adobe's Content Aware offerings. The algorithms cloned hair from an adjacent student and did not produce as clean of a clone that I was able to attain with the open source alternative. This is not to say with some tweaking a more acceptable result could not be attained, simply that for this experiment the winner is the free and open source application.

This was definitely not the ideal test for either program, but an interesting case study. Both work much better at patterns that would not be as tight as a stage curtain and need more of the pattern surrounding all sides of the subject to be removed.

If you are interested in experimenting with the GIMP version, you can find the download information for the resynthesizer plug-in here. If you are using GIMP on a Windows system don't fret over the old version that is available, I did my above testing on Windows XP and it works great. You may need to download an updated Heal Selection script from the Gimp Plugin registry and then use the Heal Selection option found under the Filter - Enhance menu. The updated .scm file fixed an error I encountered with the resynthesizer plugin. After I had downloaded and copied this file over I was able to do all the testing referenced above.

I will have a sample photo up I have been working on using the resynthesizer with Gimp 2.8 to follow up soon, stay tuned!

Blessings,

Jesse